Showing posts with label scarf. Show all posts

Monday, March 03, 2008

Can't Compete with the Yarn Harlot!

Stephanie, the Yarn Harlot, has been posting wonderful photos of her isolated Canadian snowy retreat. I can't match that for isolation, but we also have snow here in the Midwest US. Here's a shot of non-isolated country side in New Glarus Wisconsin, a town settled by the Swiss and where you can find lots of wonderful Swiss chalets. Our local knitters' guild hosted a weekend of knitting (no lessons, just fellowship and knitting) in a chalet style motel. While we knitted blissfully and fearlessly away, Mother Nature did what she does best here, she snowed!

CNN today has an article about the top 10 places to ice skate.
I beg to differ with them about places to include. Here in Wisconsin we have lots and lots of ice skating ponds--all of them natural. None of these ice sheets poured in the middle of cities and tended by Zambonies. Of course, my favorite ice skating place was the lake in front of one of my childhood homes. The surface was never smooth (unless no snow had fallen after the lake froze and you could see through the clear black ice and watch fish swim underneath!). And we had to shovel the snow ourselves. But we would ice skate while my father ice fished. I don't know that he caught anything....we usually got cold way before the fish bit!
At any rate, Madison Wisconsin has a Currier and Ives style park called Tenney Park. In the winter, the lagoon freezes and the park shelter is given plywood walls to create a warming house and skate rental concession. Oh, you can also purchase hot chocolate. I couldn't find a photo of the skaters, but this photo gives you an idea. When the ice is sufficiently frozen, the parks department sends out a pick up truck with plow and some water hoses to add a smooth surface to the ice. Skaters and hockey players skate under the arched bridges and go into the shelter for hot chocolate. Great fun!! Especially when the shelter is not open and the flood light are not on and you can skate under the stars.

In my last post, I lamented my slow knitting progress, at least as it compares to Stephanie the Yarn Harlot. (Why do I feel such competition with her?? She's younger, driven, etc., etc. Get a grip, Gail!! Chill!!) I thought that maybe I could post photos of items I completed a while ago, to make it look like I've accomplished more than I have recently.

This is the scarf daughter #1 ordered for Christmas. I made the mistake of taking her to a yarn shop and telling her to select yarn for a scarf. She selected some gorgeous nearly cobweb lace weight yarn and said she wanted a wide scarf, about 6 feet long. I used size 2 needles and doubled the yarn. That said, I also used a wrap stitch to make faster progress. Here are some photos. I finished it in mid-January. It was a Christmas present.

I separated the wrap stitches with smaller and larger segments of garter stitch. And used both double and triple wrap segments.

It has a somewhat lacy texture--my daughter said, "Don't bother with lace, I won't notice it anyway." Here, I was thinking heirloom lace, exquisite knitting....

Another reason I can't compete with Stephanie is that I tend to do more stupid things than she does. Rather than stick to my basic sock "recipe", which is the same as her "recipe", although I did NOT copy her, I thought I'd try a short row heel in these socks for my father. I used Lucy Neatby's idea that one should take 60% of the stitches of the leg of the sock. But, I used stockinette instead of garter stitch, as she does, and I achieved a heel that would fit an elephant.


I will save the photo of the finished socks for another post. That way, it will look like I've been knitting like crazy and keeping up with Ms. Y. H. Stay tuned!!

Wednesday, December 05, 2007

Awash in Seafoam and Surrounded by Scarves

Many of my knitting friends as well as people I see on the street and in yarn shops ask me for the pattern for the "seafoam scarves" that I make and wear. Therefore, I promised to put the pattern on my blog. I assure people that it is easy to make, but they don't always believe me. Here's a photo of some of the seafoam scarves that I have made for my Christmas gift basket this year.
Free Pattern for Seafoam Scarves

1. Buying yarn. I use one skein of yarn--typically medium weight hand dyed sock type yarn such as Koigu KPPM, Mirasol Hacho, Interlacements Tiny Toes and the like. I have found that Hacho makes the shortest scarf (37 inches) when using only one skein, then for a slightly longer scarf (41 inches) Tiny Toes (my LYS carried Tiny Toes in "one-sock" skeins), and for my longest scarves (52 inches), Koigu. Of course, you can use any weight yarn and any amount that you wish. Simply adjust needle size accordingly . Self striping and shadow type yarns work very well. I used one skein of Skace's Avanti for a scarf for my sister and she loved it!

2. Selecting needle size. I use size 4 needles for the yarns listed above, or, if you use a heavier yarn, I use one needle size smaller than recommended on the ball band.

3. Number of stitches to cast on: Cast on a multiple of 10 plus 6 stitches. For my one-skein scarves, I used 26 stitches.

4. The knitting: All rows are knit.
Rows 1-8 (or rows 1-4, or rows 1-6--knitter's choice!) Knit every row. This is the beginning edge of the scarf. After this, do the pattern stitch until you have enough yarn to knit 8 (or 4 or 6) rows to end the scarf. Bind off loosely. I use the Elizabeth Zimmerman's sewn bind off that can be found in all of her books, I believe.

Seafoam Pattern Stitch: (from Barbara Walker's Second Treasury of Knitting Patterns)
Rows 1 and 2: Knit

Row 3 (right side): K 6, *(yo) 2 times, k1, (yo) 3 times, k 1,(yo) 4 times, k 1, (yo) 3 times, k 1, (yo) 2 times, K 6* repeat from * to end of row.

Row 4: Knit, dropping all yo's off the needle without knitting them.

Rows 5 and 6: Knit

Row 7: K1, rep from * of Row 3, end last repeat k1 instead of k6.

Row 8: As row 4.

Blocking instructions are important. See this post for instructions. The scarf looks best when blocked quite severely.

My Dad's scarf
Last year I made my 81 year old father some lightly felted mittens using a Komi pattern. This year I made him a reversible scarf to match the mittens, but using a knit and purl stitch pattern instead of a color pattern. I can't remember the name of the stitch pattern that I used. I just pulled out my leftover Cascade 220 from the mitten project, pulled out some size 5 needles, cast on stitches until it looked like enough, then worked the pattern until it looked long enough, but not too long!!


In his older years, my father has become a very appreciative recipient of my knitting. When I was younger, I made him a cabled vest out of fingering weight yarn in browns. I don't recall that he ever wore it. Brown wasn't his color and neither were vests. I'm glad that I can finally make him something that he will wear--he loved his mittens last year. Said they were the warmest mittens he ever had!! (He sure knows how to sweet-talk a knitter, doesn't he!) He even asked me to make a cord to put through the sleeves of his parka to hold his mittens. He doesn't want to loose them!!!

My father has made us many wonderful wood items for Christmas presents. Beautiful boxes to hold treasures, a stable for our Nativity set, a gorgeous quilt rack, a clock, a pen, a candle holder with a hurricane glass top, and more. The first item I remember was a ranch style doll house with a removable roof--and a book of wallpaper samples to use in decorating the walls!!

Mosaic Scarves
After making the one-color scarves, I decided to do something more challenging--two color scarves! I saw an Amy Anderson scarf from her pattern called "Pardon Me Your Slip Is Showing". (Amy doesn't have a website, but you can order her patterns (by telephone) from Lakeside Fibers.) Unfortunately, I failed to read Amy's carefully written instructions before buying the yarn. I selected two yarns, one solid and one hand painted, and one of the hand painted colors overlapped with the solid color. Result: complete lack of mosaic effect, but attractive nonetheless. I used a beautiful merino/silk blend from Manos del Uruguay called descriptively "Silk Blend". The fabric is soft and the color shimmers. Perfect for the NorthWest USA.
Now, for my second mosaic scarf, I decided to use two colors of shetland wool. Because I was using my stash and because I wanted the scarf to be manly, I picked a reddish and a grey . I thought, for sure, that the mosaic design would be discernable. But it wasn't. Nevertheless, I liked the effect--and I wasn't about to rip it out and start over with new colors.

Lo and behold, when I photographed the scarf, I started to see a pattern!
Can you see it? Maybe not. Maybe it was an optical or wishful illusion.
It's subtle, I grant you that. My apologies to Amy Anderson--her pattern clearly says to use "contrasting" yarns and not to have a hand painted yarn that overlaps with the solid color! Next time, Amy!

Meanwhile, I'm off to make a beanie and fingerless gloves out of Peace Fleece!

Saturday, December 01, 2007

Reversible Scarves or Living Inside Out

As I write this in Wisconsin, Mother Nature is giving us good reason to keep on knitting. Snow, wind, sleet, ice coming at us from all directions and encouraging us to sit in front of the fire and knit! Alas, my knitting these days is mind numbingly boring. I long to make beautiful Dale of Norway patterned sweaters-- thick, beautiful and warm. Protection against elements that Mother Nature throws at us periodically.

Unfortunately, in my post-menopausal temperature recalibration, I can no longer wear warm wool sweaters for more than 15 minutes. My body temperature has changed from being constantly cold and blue fingered in my youth to tending toward toasty in my somewhat older years. Wool socks on my feet and a warm, wool scarf around my neck and I can practically trot around nude in winter. Well, not quite, but I can dress comfortably in a cotton turtleneck and jeans without shivvering. A wool sweater does what the word suggests--I sweat!

This means, I've been making a lot of scarves, for myself and for others. I have practiced wearing them in as many ways as possible--wrapped twice around my neck (I have a short stubby neck and I long for the Audrey Hepburn type women who have giraffe like necks that look good in repeated, multiple wraps of wool!) ; folded in half with the ends tucked into the fold a la European style; hanging loosely over my shoulders, dangerously dangling ends that might get caught in revolving machinery; tied over my shoulder with one end in front and one in back.

But, none of these methods guarantees that the pattern side of the lace or cable design will be dazzingly on the "public" side of the scarf, to impress the passers by. I am constantly rearranging the "casual" panache that I try to impart with my dramatic hand made scarves!! The panache goes down a few points when the scarf is obviously inside out! How can I be dashing and daring with an insideout scarf???

Therefore, I've been trying to produce reversible scarves. Two posts ago I displayed a seafoam stitch scarf that has two identical public sides. I've now made about 10 of these scarves for myself, family and friends, out of beautiful handpainted yarns, and I needed to branch out.

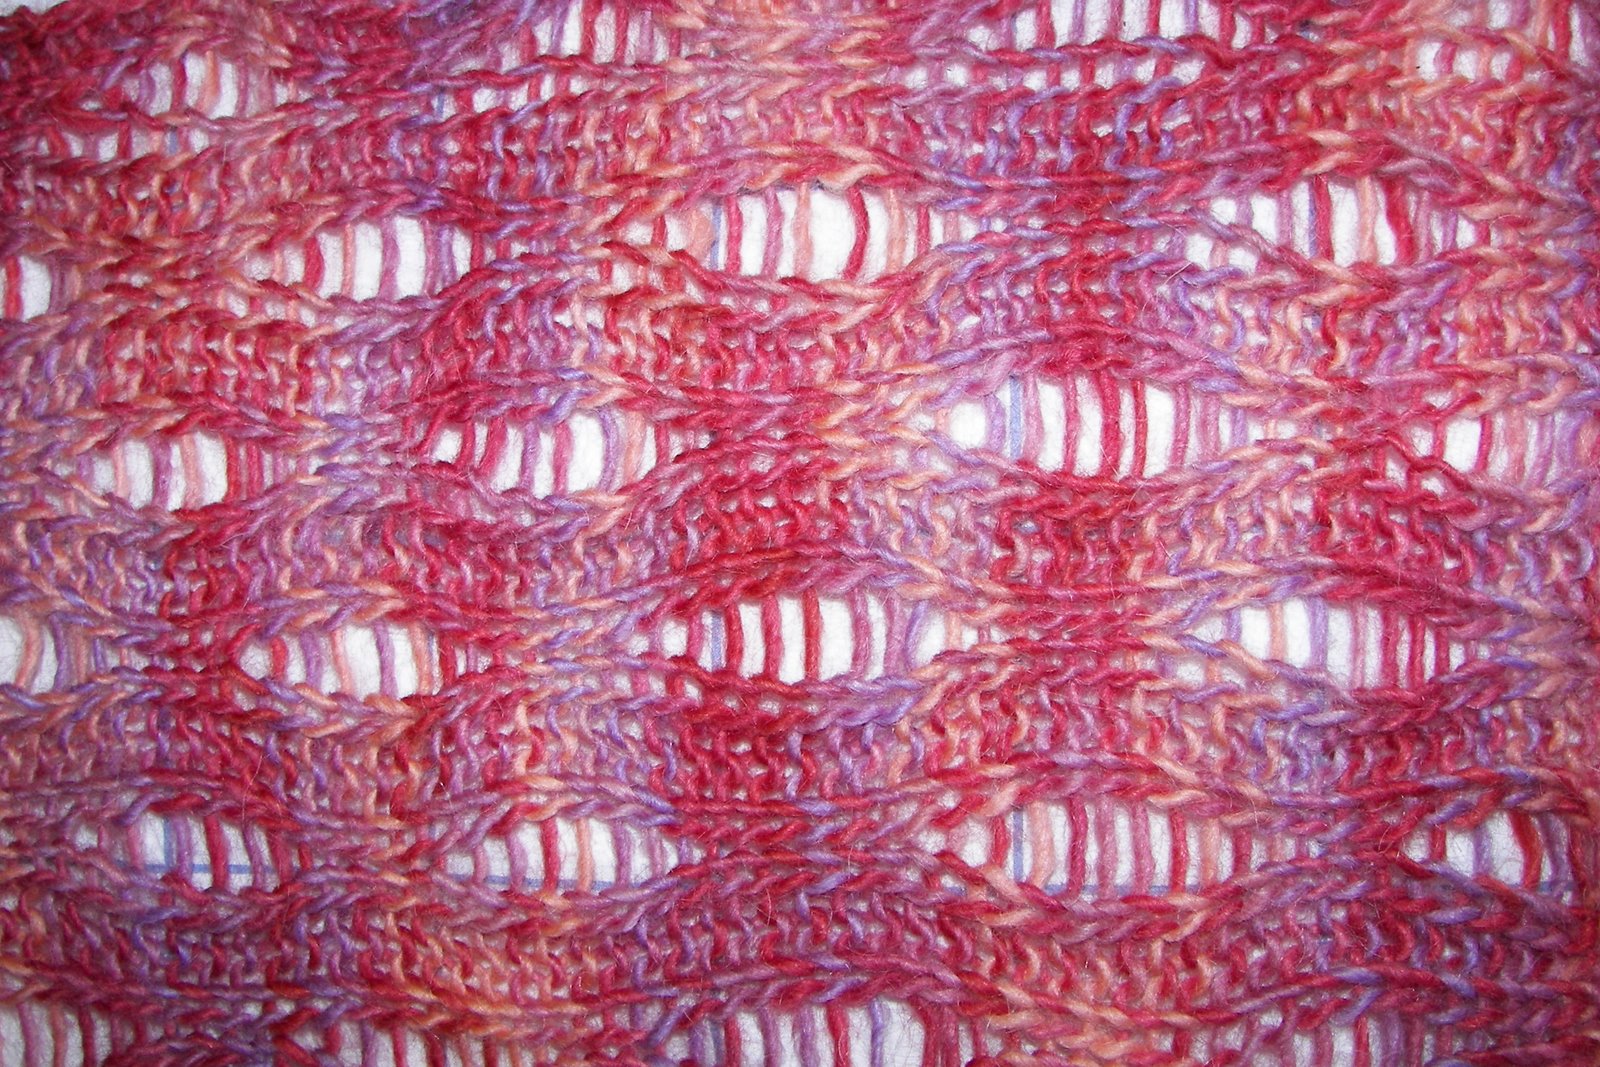
Barbara Walker to the rescue. Her seafoam stitch is on page 218 of her Second Treasury of Knitting Patterns. Lo and behold, on the opposite page, page 219, is another reversible pattern--the Vertical Drop-Stitch. Fortunately, this reversible stitch gives two equally attractive but different public sides.

OK, here is one of the public sides, with a weird stripped effect from the flash. This is a sideways view.

Here are the two public sides, next to each other. Can you tell the difference? No? Good. It's subtle and will not make the casual observer think you are wearing part of your clothing inside out, as if you don't know what you are doing.
But here, closer up, you can see that there IS actually a difference, noticeable mostly to knitters. The left side of the picture has wavy two-stitch columns. The right side shows wavy one stitch columns.
Still don't see it? Maybe this is better. It's hard to photograph.
The yarn is a hand dyed wool/mohair from a Wisconsin dyer--Joslyn's Fiber Farm, that I purchased this summer at Meg Swansen's Knitting Camp.

Next post, a manly man reversible stitch pattern for my father's scarf!

Friday, November 09, 2007

Seafoam Stitch blocking tutorial

I know, I've been ignoring my blog. Sometimes life just gets in the way. However, I've been knitting like crazy on Christmas presents. This year I will reprise my successful Basket of HandKnit Items, from which family members and friends can select a present. This year the basket will be filled with scarves and socks. Last year it was mainly hats.

This year I am in production knitting mode for the basket. I find that I am more broadminded than others, even if I say so myself, on what type of hand knitted items I will wear. Therefore, rather than getting "creative" with my knitting, this year I am sticking with a scarf pattern on which I have received rave reviews from recipients and observers alike--a one-skein scarf using the seafoam stitch. I should carry patterns for this scarf because MANY people, knitters and non-knitters alike, ask me how I made the scarf when I wear one.

I recently drove my parents to Colorado to visit my sisters in Denver and Boulder. When I was not driving, I worked on a seafoam stitch scarf. My mother fell in love with the scarf and decided that she would make one for a Christmas present. However, my mother hates knitting. She hates building fabric one stitch at a time. But, she can't bring her sewing machine with her when she spends a month in Colorado. Therefore, to pass the time in Colorado, she decided that she would knit. Otherwise, she spends all of her time cleaning my sisters' houses. (Somehow, the "keep the house clean" gene did not find its way to any of my mother's three daughters!!)

My mom is an insecure knitter. Every wrapped stitch and evolving pattern in the scarf on her needles is examined for perfection. I keep telling her, "Relax, mom. Blocking will eliminate all the perceived problems and you will have a gorgeous finished object. " She doesn't believe me. She wants it all to be perfect while still on the needles!

This post is my "blocking tutorial" for my mom and for whomever needs a little knitting reassurance on-line. Believe me, it's hard for a scarf to go wrong with the seafoam stitch and some pretty handpainted yarn. (Mom, I know that you are not working with Koigu yarn, and the following photos show a scarf in Koigu. If your scarf doesn't look exactly like this one it's OK. Yours will also be beautiful!!)

Mom, this is for you!

BLOCKING THE SEAFOAM STITCH SCARF TUTORIAL

Step 1: Soak the finished item in cool water for 30 minutes.

See how some of the scarf is dark purple and some is light purple? The light purple portion of the scarf is floating on top of the water. Wait until all of the scarf is underwater! You need to have every little wool fiber saturated with water. That's why I said to soak the scarf for 30 minutes. If your scarf is saturated in 15 minutes, move to step 2. Don't shortchange the soaking.

Step 2: Squish the water out of the scarf by pressing it against the side of the sink bowl. (Oh, don't forget to pull the drainplug first!!) DO NOT WRING the scarf. Just gently squish it against the side of the bowl. Don't worry if the scarf is still dripping when you move to step 3.

Step 3: Plop the scarf onto a towel and fold the towel over the scarf.
Step 4: Stomp on the towel.
Step 5: Spread out the scarf on a bed sheet on top of a bed or on a floor carpet. I spread a bed sheet out on the living room floor carpet. You need something underneath the sheet into which you will stick pins.
Step 6: On one end of the scarf, pin out the points created by the seafoam stitch pattern; see below.

Step 7: With your hand, gently pull out the scarf until you have the degree of "airy-ness" that you want in the scarf. Mom, with the yarn you are using, you will need to stretch the scarf quite a bit to get it long enough to be a scarf.

Don't worry, you stretch as you go with the pinning. The yarn won't break. As you can see in the photo, I put a pin at each segment along the edge where there is an accumulation of four ridges of garter stitch.

I also spread out the scarf width-wise as I pin, because when I stretched the scarf for length, the scarf got too skinny. The un-pinned section of the scarf is on the left of the photo above. The pinned portion is on the right of the photo.

Step 8: Now, after you have finished pinning out the scarf, with points pinned out on each end, you can check the seafoam ovals for perfection!


Ah, HA! I found a wiggly strand in a seafoam oval!!! Look just to the right to the yellow-headed pin that is on the middle left of the scarf photo below! Baaadd, baaaadd, baaaadd!!!
I would just leave it alone. But I know, Mom, that this will bug you to your grave! So, get out a pointy object, like a knitting needle, and stick it under that wiggly strand. Give the needle a tug.
When you gently tug the strand, you will see or feel a neighboring strand move and become straight. Go in the opposite direction, gently tugging successive strands, until you have worked in the excess wiggles of that miscreant wiggly strand. For a moment, it will look as if you have created more of a mess than you had in the first place. Keep cool. As you work along, you will see that you have used up the excess and the oval now looks perfect. If it doesn't look perfect to you, just tug at the scarf as a whole around that area. It will all work in. See photo below for proof!
See mom, I told you so! It will all work out in the blocking!! Good luck on your scarf!!! Hugs and kisses to you and Dad, and to the dogs and cats and humans at the places you are visiting!!

Love, Gail

Tuesday, October 09, 2007

Holiday Knitting and My Mom

Making presents for Christmas was always a tradition in my family. I think it may have started during the depression, when my parents' parents didn't have any money to purchase presents. I remember my mother telling me about how her father would glue colored pictures (from magazines? calendars?) to a piece of wood and then cut it into pieces with his jig-saw making jigsaw puzzles!!

My mother always made each of us (five of us) a new outfit or new pajamas for Christmas. Usually it was a new outfit, and for the girls, a matching outfit for our dolls. One Christmas she made a three piece wool suit (jacket, pleated skirt, vest) for my teenage sister, in addition to making items for everyone else. And, she made everything in secret. How, on earth, did she do this??

My dad also made things, such as a doll house one year. It was a simple ranch home with a removable roof and removable walls. He also gave us a discarded wallpaper book. We decorated the walls and floors with ever changing wall paper! We also made furniture out of boxes and cardboard.

These days my dad makes beautiful wood items for each of us, carefully turned decorations, lovely boxes with fitted joints and inside shelves. As they've aged, my dad's creations have become smaller and more intricate and my mom's have become simpler. Sometimes she makes placemats or decorative pillows out of sale item placemats!

One thing my mother never did was to knit. She was a seamstress who hated making "fabric" stitch by stitch. Knitting was not relaxing to her. She learned to knit in the late 1940's when all the girls made argyle socks for their boyfriends. No wonder she didn't like to knit, when you first project is argyle socks, who could ever fall in love with the process???!!!

However, she must have knit a little when I was young. She described knitting wool soakers, felted wool diaper covers in the days when rubber was in short supply after "THE" war. No wonder babies in those days were "trained" early!

My mom also must have made two wool ascot style scarves that were in our mitten/scarf/hat drawer throughout my childhood and that of my four siblings. There was a smaller pink scarf and a larger red one. The little kids wore the pink one and graduated to the red one at some point. I'm not sure what my brothers did--maybe they went straight to the red one. Those scarves are long gone, but they looked like this.

The neck portion was just long enough to go around our necks, outside of our jackets, as I recall.
The ends looked like little hearts, I always thought, or maybe triangles, or spades from the deck of cards.
The narrow part was a little pass through for inserting the other end. The flanges of the heart end prevented the end from slipping out.

A few years ago, while teaching elementary school kids how to knit, I 'unvented' the pattern from my memory of what the scarves looked like. I'm sure there must be published patterns around, but I haven't seen them. I made this scarf as a sample and the kids liked making it. It may be the first scarf ever finished by a beginning knitter!!

At any rate, I resurrected the pattern for my knitters' guild charity knitting challenge. Instead of a knit along this year, we are making monthly items for donation to local charities and schools. For November, the item is kids scarves. You can find the pattern here, scroll down to the second half of the post--look for the photos.

If you make one of these scarves, consider donating one to your favorite local charity. And, think of all the moms, whose skills, care and love kept us warm during the cold winters!!

Meanwhile, I am busy knitting items for presents this winter. I flit from project to project, beginning many, finishing few. Photos and more later.

Sunday, August 19, 2007

Knitting on the Road

No, this isn't a post about the wonderful book of socks. Rather, it is about some of my knitting while traveling this summer. I didn't finish, or start, anything extraordinary. Rather, I just knit things I didn't have to concentrate on. We were on the road for three weeks exploring northern Idaho and Washington State, on our way to Seattle for the wedding celebration of my step-daughter.

In an earlier post, I showed you the not-lacey wedding shawl on the floor, being blocked. Here are two photos of the finished product.

This is daughter #2 (now 16 years old!!) modeling the shawl at the family gathering that celebrated the marriage of step-daughter #1 (now 40 years old!). You can see how sheer the shawl is. I used laceweight cotton. Never again.
And, here is the front. Pattern is the Landscape Shawl by Evelyn Clark, available through Fiber Trends.

And finally, the bride and groom, cutting the wedding cake, with the shawl draped around the bride's shoulders. I was very happy to participate in the wedding by making the shawl. And, I think that the bride truly loved the shawl. I hope she wears it frequently.

I knit a lot while in the car and on airplanes. For airplane knitting, I decided to take bamboo circular needles and not my 2.5mm circular needles on which socks-in-progress were dangling. On the way out of the door when we were leaving on vacation I grabbed three balls of variegated cotton yarn--I purchased the yarn last summer while in Barcelona, Spain, from a yarn shop owned by a knitting friend in Barcelona. She is American, her spouse is Catalan/Spanish. I didn't know what to do with the yarn at the time. But, I like bright colors. After I get home with bright yarn I question my sanity. However, I thought an airplane ride would be perfect for forcing me to make a decision.

After swatching (I tried the seafoam stitch--doesn't work well with cotton, I discovered) I decided to use the yarn for a fishnet lace scarf, from the Montego Bay Scharf pattern in Summer 2007 Interweave knits. Amy Singer wrote the pattern. It's not difficult at all. A simple four row pattern that is really a two row pattern. But, somehow I managed to get off track at the beginning. Maybe the airplane hit some turbulence. Or the man next needed to climb across me to get into the aisle. Do you see the problem??
I didn't see the problem right away. I just kept merrily knitting along. When I finally realized that my fishnet rows didn't line up in row 6 or so, I had three options:
1) rip out 12 inches of knitting to fix it
2) pretend there was not problem and that no one would ever notice
3) cut off the beginning and knit on a border.

I chose option #2. Denial. Belief that the knitting fairy could come one night and fix it. Pretend that the end of the scarf is supposed to be wonky.

So, I knitted and knitted. About 5 or six feet of knitting. Because I made a garter stitch border on the sides, at the end of the scarf I did 8 rows of garter stitch and bound off. Then, I looked at the beginning again. Option #2 was not the right option. I needed to implement Option #3. Cut it off!!!

By this time, I was in a long distance car ride and hubby was driving. Bless him.

I figured that I could use waste yarn (that I luckily had in my purse) to make a safety line. But, I couldn't seem to follow a straight line. The scarf is really on the bias. And I could not, for the life of me, seem to follow the pattern. So, after multiple false starts, I painstakingly used a needle to pick up the stitches, tugging on each stitch to find out where it led to the next stitch. Painstaking. Real painstaking. Did I mention that I was doing this in the car?


Well, it worked. I used the picked up stitches to do 8 rows of garter stitch, and then cast off! I didn't add the fringe that Amy Singer used. I decided to give this scarf to my Boulder, Co sister and she is only 5 feet 1 inch tall.

Why did I ever think that #2--denial of the problem--was ever an option? I would have been embarrassed to give the scarf to my sister, who would never have noticed the problem. But, I would have known. Why do I do this--pretend that a mistake will never be noticed, when I would notice--even if I never saw the item again in my lifetime??

Ah well, here are some photos from the road trip.
The first one is sunset over either Priest Lake or Pend d'Oreille lake in northern Idaho.


Next photo is not photoshopped! For some strange reason, there is a miniature statue of liberty at the beach in Sandpoint, Id. The sign did not explain.

We stayed one night in Leavenworth, WA. This was a dead or dying former lumber town back in the 1960's. Then, some civic minded citizens decided to save their town by turning it into a Bavarian village. They succeeded and it is now a tourist destination, complete with Bavarian style buildings all over, Bavarian dressed store clerks, and a production of Sound of Music every summer in an outdoor ampitheater near the ski hill.

Last week I attended the 40th high school graduation weekend of my small (33 graduates) girl's convent school. Here are some of us looking grey but happy!!
More of my on the road knitting later.

Thursday, January 18, 2007

Still Catching Up

Many knitting bloggers are posting about new projects for the new year. Unfortunately, I am still catching up from 2006's Christmas presents. Somehow this happens to me every year. I give people a box of yarn--these are people who do not know how to knit and do not want to learn. (yes, I also have a hard time believing the some people actually do not want to learn to knit, but they do exist. Right in my own family!!)
This past Christmas I gave my mother THREE-FOURTHS of a sock. She was very excited about it--I think. I must tell you that she showed excitement and deep appreciation when she unwrapped the box labelled "Christmas lights." She thought I had given her a box of Christmas lights!!! Now, I ask you, who would give their mother a box of Christmas lights???? And, what mother would be excited about a box of Christmas lights?? My mother did a good job of feigning excitment about the Christmas lights. Therefore, I couldn't tell whether she was feigning excitment about the 3/4 sock or not!!
Let me assure you, however, that she actually liked the completed socks. I used Paton's Kroy sock yarn in a heather-y blue and a pattern from Interweave Knits Spring 2004. The Waving Lace Socks by Evelyn Clark. I added eye of partridge stitch for the heel, just to look pretty for my mom.
Remember the basket of knitted items, from which friends and family could select an item?? Some of those items were not finished objects. This scarf, for example, did not have its ends sewn in. Nevertheless, my step daughter's boyfriend (very, very nice boyfriend whose mother used to knit a lot and APPRECIATES handmade items!!!) selected the scarf for his present! I think this is a boyfriend made in heaven, if you ask me.
The hat for step-daughter was also not complete. It did not have its tassel, nor did it have the microfleece lining sewn in. I was able to finish both, however, while she was looking at family slides with her dad!! My 15-year old demonstrated how one can get the tassle spinning (while wearing the hat, of course) and almost achieve lift-off!! Just watching her do this makes me dizzy. But, step-daughter was very entertained and actually got the tassle spinning!
My 15-year old received one mitten for Christmas. I finally finished mitten #2 and felted it a bit. She likes the mittens--to look at--at to wear--theoretically. Although the weather has finally reached normal (that is, cold) temperatures and we have snow on the ground (hooray!!) she has yet to wear the mittens. She says she is afraid of loosing them. Hmmmmm, Anyway, the pattern is from the book Folk Mittens, a favorite of mine. I used Cascade 220 periwinkle and Ultra Alpaca cream. The mittens are nice and cozy--I hope youngest daughter wears them someday. If she doesn't, the periwinkle also matches my new winter jacket.......

The leftover sock yarn blanket is an ongoing gift for the youngest. I hope to complete it before she goes off to college. Although I promised that I would use only LEFTOVER sock yarn, my definition of "leftover" has expanded. I used yarn leftover from socks that I made and from socks that other people made but I ran out of yarn. I can't knit socks fast enough to fuel the blanket project. Therefore, I have begun to use leftover sock yarn from yarn shops--those 50 gram one-ball remnants that go into the clearance bin because the store doesn't have a second ball. I feel like standing on a street corner begging, "Leftover sock yarn, please help an old lady warm her daughter!"
So far, I've made 90 squares. I gave youngest daughter 9 more squares for Christmas--the squares in the top row. She actually uses this item. It's not big enough to serve as a blanket for her bed, but she puts it ontop of her comforter and it provides nice extra warmth.
My "rules" for making the blanket are here. I would be very (extremely) happy to purchase any leftover sock yarn that you have. (washable and self striping preferred) Just let me know and I'll also pay postage.

I've also been working on my husband's Christmas gift for 2005!!! I won't repeat the painful time we had picking out the pattern and yarn. I finished the color work on the sweater and now am doing boring, boring, boring stockinette shaping the neck. I just can't face it. I am in the black hole of knitting where you knit 10,000 stitches and measure the progress, only to find that the measurement decreased rather than increased!!!! I won't even show you a picture, it is too painful.
What does a knitter do when she is bored with a project??? Cast on for a new project!!! I need mittens. Weather here is COLD!! I opened up the gorgeous book by Charlene Schurch, Knitting Marvelous Mittens. [Digression__I love her patterns and have made three or four of them. But, I can NEVER get the proper gauge. My dad's Christmas mittens from the book ended up 15 inches long!!! And, he has short stubby hands. Fortunately, I like to felt mittens to keep out the wind. His finished mittens will keep out a winter gale!!] I am following a pattern for child mittens, size 3 needles and Mountain Colors weaver's quarters and Ultra Alpaca. I needed to begin decreasing about 10-12 rows sooner than the pattern called for. And the first mitten is fabulous!!


Can you tell the difference between the two photos??? It's not a mistake.

This, however, is a mistake. I tried doing the kitchener stitch for the top of the mitten, but it looks sloppy--especially since I couldn't work the pattern repeat for the desired length. I'm going to pick it out, turn the mitten inside out, and use a three needle bind-off.

My school break ends tomorrow. Back to school on Monday. I have loved knitting so much during the break, and hosting company. And I was tickled to see how excited people were to paw through my basket of hand knit hats, scarves and mittens. I'm going to keep a basket of items, I think, just for the fun of it!!